
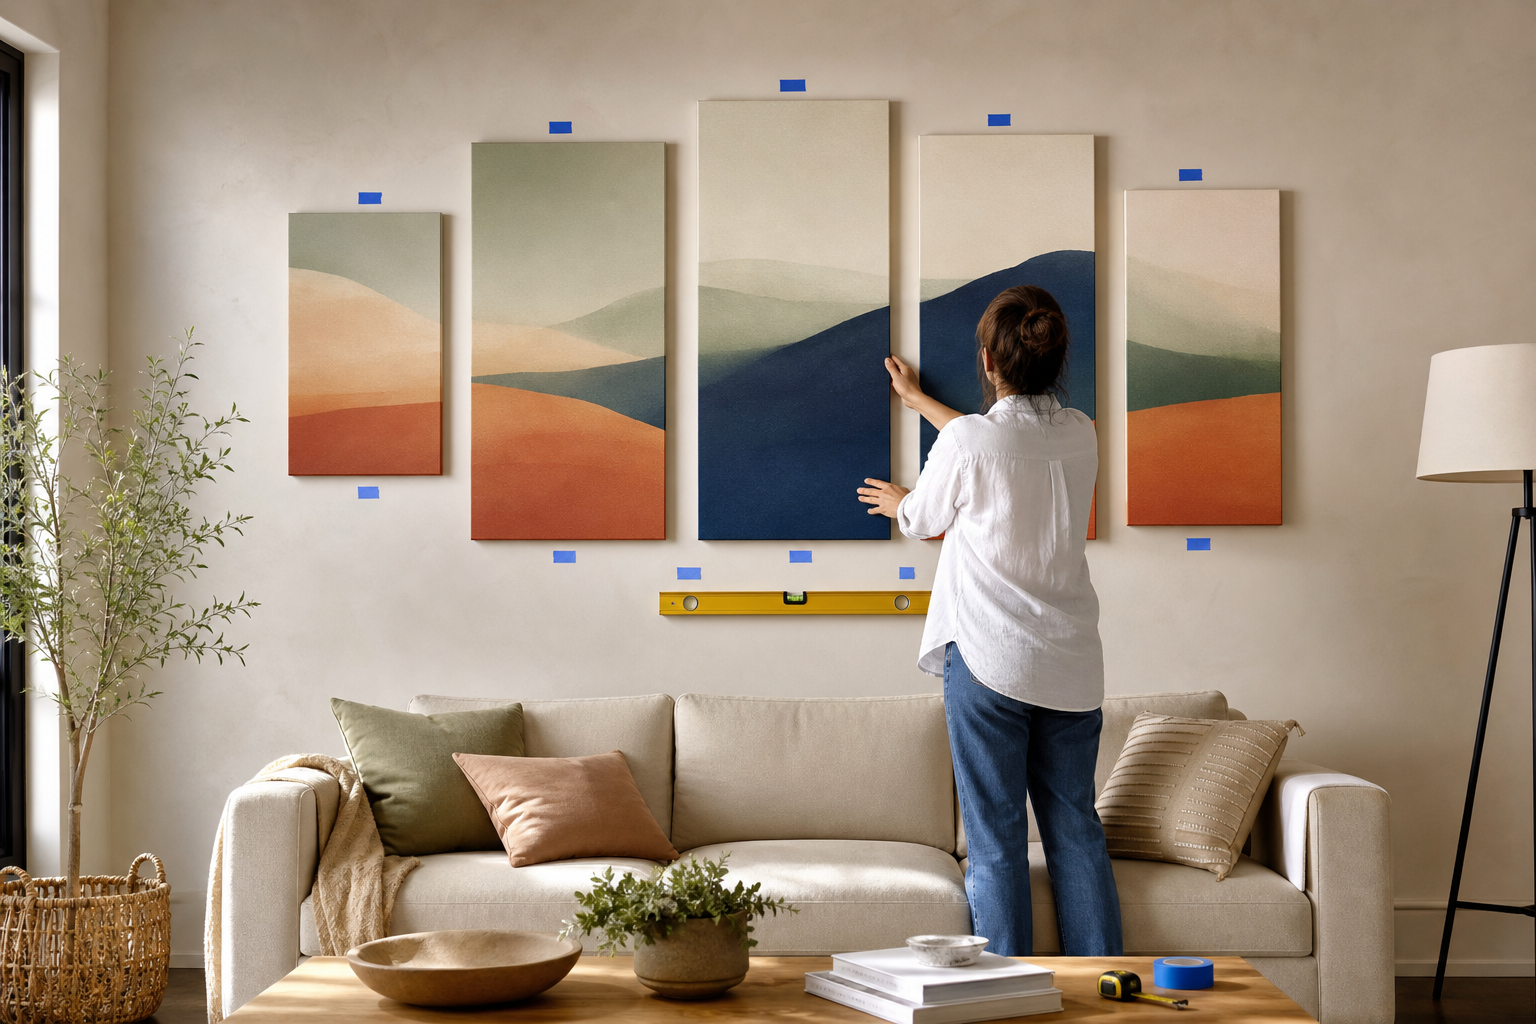
The short answer: treat five-piece wall art as one composition. Measure every panel, choose a consistent gap, calculate the group’s total width and height, and test the arrangement with paper templates before making holes. Start with the centre panel, establish a level reference line, then work outward while checking each gap.
Do not assume the listing includes a particular frame, hook, anchor, template or mounting method. Confirm the exact variant, delivered components, total weight and wall construction before choosing hardware. When unsure—especially over beds, sofas or high-traffic areas—use a qualified installer.
Five-panel layout formula
| Measurement | How to calculate | Why it matters |
|---|---|---|
| Total group width | Add all five panel widths plus four gaps | Shows whether the composition fits the wall or furniture |
| Total group height | Use the tallest panel from its intended top to bottom | Prevents collision with ceiling, trim or furniture |
| Visual centre | Find the centre of the full group, not merely one frame | Keeps an asymmetrical set balanced |
| Reference line | Choose the common centre, top or bottom alignment used by the design | Controls the stepped arrangement |
1. Confirm what the exact variant includes
Open the live product and variant rather than relying on a search thumbnail. Check whether the panels are framed, stretched, rolled or otherwise prepared; verify every listed dimension; and note whether hardware is explicitly included. A title containing “frame” does not establish the construction of every variant.
Compare products such as the Grand Lion Howl 5 Piece Wall Art and Venice Restaurant 5 Piece Wall Art. Use their current pages for actual options. Do not copy dimensions or installation assumptions from one design to another.
2. Measure the wall and nearby furniture
Record the usable wall width between corners, doors, windows, switches and vents. Measure from the floor to ceiling or trim. If the group sits above furniture, measure the furniture width and its top edge. Mark the proposed outer boundaries with low-tack painter’s tape suitable for the wall finish.
Leave enough separation that the artwork does not look attached to the furniture or become struck by cushions, heads, doors or objects placed on the surface below. There is no universal perfect height; viewer eye level, ceiling height, furniture and panel shape all influence the result.
3. Calculate group width before choosing gaps
Let each panel width be W1 through W5 and the intended equal gap be G. The overall width is W1 + W2 + W3 + W4 + W5 + 4G. If the panels vary in height, calculate overall height from the highest top edge to the lowest bottom edge in the planned stepped layout.
Small spacing errors multiply across four gaps. Make spacer blocks from cardboard at the chosen width so each gap can be repeated. The Tree Seasons 5 Piece Wall Art and Black Lotus Graphic 5 Piece Wall Art illustrate why uninterrupted visual flow makes consistent spacing important, while exact motif placement remains product-specific.
4. Build paper templates
Trace each panel onto kraft paper, label its position and mark the hanging point measured from the panel edges. Tape the five templates to the wall using a finish-safe method. Step back from several viewpoints and sit in the room’s normal seats.
- Check the group centre against furniture or the chosen wall zone.
- Confirm that stepped tops and bottoms follow the intended sequence.
- Inspect glare at daytime and evening lighting conditions.
- Look for conflicts with vents, switches and doors.
- Photograph the test layout before removing templates.
5. Choose an alignment system
Many five-panel sets use a tall centre panel and progressively shorter outer panels. You may align their vertical centres, follow a shared horizon within the artwork, or use a specified template. The correct reference depends on the image and panel dimensions.
The Abstract Art 5 Piece Wall Art may be evaluated by overall colour and shape flow, while representational scenes may have a clear horizon. Never trim, stretch or rotate panels merely to force alignment unless the product instructions allow it.
6. Identify the wall and total load
Drywall, plaster, masonry, tile and wood need different fasteners. Determine panel weight and whether the hanging system uses one or two points. Select hardware rated for the wall type and the supported load with an appropriate margin, and follow the hardware manufacturer’s instructions.
Do not guess at hidden electrical wires or plumbing. Electrical Safety First advises checking for hidden services before drilling. Stop if the wall type or concealed-service location is uncertain. Rentals, historic finishes and masonry may need permission or professional installation.
7. Hang the centre panel first
- Transfer the centre template’s hanging marks accurately.
- Install the wall-appropriate hardware as directed.
- Hang the centre panel and confirm it is level.
- Use the fixed spacer to position one adjacent panel.
- Work outward, alternating sides to maintain balance.
- Recheck the full group from a distance before final tightening.
A bubble level or laser can establish a reference, but panel frames and hanging wires may settle differently. Measure the visible edges after hanging rather than trusting hardware positions alone.
8. Reduce fall and impact risks
Panels above a bed, crib, sofa, stair or play area deserve extra caution. Use secure, load-rated hardware compatible with the wall and artwork, and consider professional installation. Keep ladders on a stable level surface; Health Canada advises maintaining three-point contact and not overreaching.
Reinspect after the first day and periodically afterward. Look for loose anchors, stretched wire, tilted panels, dampness or wall damage. Remove the artwork before moving furniture that could strike it.
9. Care for canvas without inventing a method
Follow the product instructions. Keep canvas away from persistent moisture, direct high heat and locations where cooking residue or splashes accumulate. For routine surface dust, use only a method approved for the material; do not spray cleaner directly onto artwork.
The Canadian Conservation Institute notes that light exposure can cause fading and other changes in collection materials. No canvas print should be promised permanent colour. Manage strong direct sunlight and rotate or shade displays where appropriate.
Frequently asked questions
How much space should be between five panels?
There is no universal number. Choose a visually suitable gap, include four gaps in the total-width calculation and repeat it with a spacer.
Should I centre the middle panel over the sofa?
Often the full composition should be centred relative to the chosen wall zone or furniture. Verify the group’s calculated centre rather than assuming the middle panel alone defines it.
Can adhesive strips hold multi-panel canvas?
Only if the strip manufacturer approves the wall surface, item type and weight. Follow its preparation and load instructions; do not assume inclusion or suitability.
Does the product include hanging hardware?
Check the exact listing and delivered package. Do not infer hardware from a title or lifestyle image.
Can I hang canvas in a bathroom?
Only if the product and environment are suitable. Repeated humidity and condensation can affect canvas, frames, adhesives and walls.
Bottom line
A clean five-panel installation comes from planning the composition as a single measured group. Verify every panel, calculate four gaps, test paper templates, establish a visual centre, choose wall-appropriate hardware and hang from the centre outward. Careful measurement protects both the design and the room.